Tuesday, August 18, 2015

Enhancing my She Cave

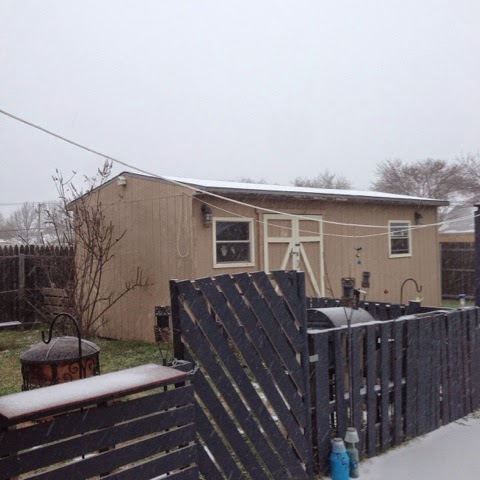
So I have this shed in my backyard.  It’s WONDERFUL!  It’s big and has real walls, a big door, windows, electricity….it’s my workspace and I love it.  Except for July and August when it’s 100+ degrees here, in Texas, and the lack of air circulation in the shed makes for very sweaty projects.  I honestly think I lose about 5 pounds each weekend I’m out there in the heat!


At any rate, I saw this video on YouTube done by the wonderful April Wilkerson, and thought, EURKA!  I have a window AC unit. I should totally put that in out in the shed to see if I can just cool things off enough that I don’t worry about passing out when I get so focused I forget to keep slamming the water.


After much thought, I opted for a spot next to my workbench, thinking that the closer it is to me, the faster it will cool me off.  Makes sense, right?  Here’s the lovely wall that a kid started helping me paint.  


If you look at the picture for very long, you’ll have some foreshadowing on what the biggest issue with this whole project turned out to be.  Any guesses?  


After measuring the size of the unit, I measured and cut the 2x4 studs to build a support structure under the unit, along with a header, of sorts, to go over the unit. That’s when it hit me.  There was an electric wire in the middle of the studs and to add more in, I would need to disconnect the wires from the plug, pull the wires out, run them through the new 2x4s, and then re-attach. GAAAAH!!!!!! So. I drilled holes in the new studs through which to thread the electric wires that run to the plug nearest the unit. 


Then I turned the power off to the shed, pulled the electric wires out of the plug and backed them through the existing 2x4, threaded the new ones in, used my Ryobi Brad Nailer to attach the studs to the other studs, along with some other screws just for good measure, and then reattached the wires to the plug.  WHEW!  Trying to manipulate that electrical conduit was WORK and without power, I didn’t have my normal fans running, and it was July in Texas and I was so afraid that I had sweat all over the wires and would short out the whole thing!  YIKES! I was worried!  I can’t tell you how relieved I was to flip the breaker back on and have the shed not explode!


Next, I drilled pilot holes in the wall in what I was planning to call the corners of the opening.  After trying a couple of times to get the circular saw to cut out the opening, I gave up and went to borrow dad’s jigsaw, again.  I REALLY should invest in my own jigsaw!  


The jigsaw was the right tool and I quickly had the opening.  


After checking the sizing multiple times, I trimmed more area off the face, then built a header of sorts to frame out the rest of the opening.  Then wrapped the whole opening with the pink foam insulation stuff, and slid the unit into the wall.  


After I was sure it was snug, I emptied a can of spray foam insulation all around the edges to try to help keep out air/water, and then put more particle board over the whole wall area to help with the finish out.


Once I got it in, I realized something.  The unit blows air UP….not OUT…..thus the totally ghetto plastic trying to get the air to go OUT into the shed.  What a bummer!  At any rate, it’s done and I think once I get the rest of the shed insulated and walled off, the unit will have a much higher likelihood of success.  


Total Cost: $18 for spray foam insulation, and the pink stuff from Home Depot

Total Time: 8 hours, mostly because I kept having to stop and go get another tool/item.

Outcome: Partial Success. 


Now go make something of your own!


**NOTE: Looking at these pictures has promoted me to go out a faceplate on that plug. MUCH better! 

Thursday, June 18, 2015

Patio furniture repurpose

Since entering that 2x4 challenge, I've been trying to build/create and post YouTube videos. I felt so bad that I had all these subscribers (a whopping 14), and almost nothing for them to watch. Ha!

I must admit, though, my heart and comfort are with the written word and still pictures (does anyone actually like how they look or sound in videos????).

At any rate...one night I built a fire in my fire pit, and D2 (2nd daughter) brought her homework, a flashlight and a blanket outside and completed it by the fire. She commented on our need for a side table on which she could set her drink and music, and it got me thinking. Here's the fire. It was really nice.

The next day, I went out to my shed to see if I could figure out a side table for outside, with existing materials. 


First, I grabbed some scrap 2x4, and built a rough frame. Then I painted some of my fence picket scraps and using my new Ryobi Brad nailer, affixed them to the side of the frame. I had some extra tile that I used as the top. I used construction adhesive to glue it to the wood frame. 


At first, I used some reclaimed scrap wood for legs. I painted them and then wrestled with how to connect them to the table. I used screws and brackets and didn't have enough clearance in the 12"x12" space to get all the screws in good and tight. It was frustrating!! 


Once I did finally get them on, I realized that the legs weren't even close to straight, and the table seriously wobbled. 

By then, I was tired and frustrated and felt like I would just have to live with it, and after all, it was scrap and would be outside being constantly degraded, so why did it matter? And I set it outside and went to bed. 


I probably would have left it like that and just thrown it out, eventually, if the dog hadn't gotten involved. 

We got so mad about her tearing up the wall, (see YouTube videos) that we chained her outside for a while. She wrapped the chain around the table and knocked off one of the legs. Now I had to fix it!

So, first I cut the legs off to the point where the one seemed to bow the most, which made a big difference. By then, the girls had given me a Kreg Jig R3 for Mother's Day, so I used it to drill pocket holes in the legs and between that, and the shorter/straighter legs, the table became instantly better! Now I actually liked it and wanted to improve it. 


I measured and cut more fence picket pieces and stained them with weatherproofing and used the Brad Nailer to place in the empty corners. I also went over it all with a sander to smooth out the rough spots. 

FINALLY! Something I could appreciate and post! :D 

Then I got to work on repurposing some other patio items. Here's the picture of those. Hopefully, I can get it all written up shortly.

Total cost: $0 Materials on hand
Total time: maybe 3-4 hours total, mostly me trying to figure it out and re-do it. 
Outcome: SUCCESS!!

Now go make something of your own...


Tuesday, May 26, 2015

A Video Post

Normally, I post written info with pictures about something I've created.  Today, I'm posting a link to a video I did about creating this.

Several weeks ago, I came upon the Summer's Woodworking 2x4 Challenge and it looked way too fun to not try.  The challenge is to see what you can build out of a regular 2x4.  Those things are cheap, so I figured it would be a relatively inexpensive way to challenge myself to do something new.
I gotta tell you. It was WORK!  Between struggles with the Table Saw from dullsville, and learning how NOT to use a planer or camera phone, I learned a great deal.  The video max length was 10 minutes, and I realized that cutting it down to that was almost as hard as making the thing.  I really like to document stuff!

At any rate, here's the video.  Hope you enjoy!


If I were doing it over again (and I may), I would shorten the post and lengthen the paddles.  I think I'm also going to do a cross beam base that will just sit over the top of the rain barrel (trash cans) when the lid is off.  I certainly have plenty of 2x4 scraps.

Cost: 2 planers, 1 mini jar of tinted weatherproofing, and 1 2x4 - $25
Time: 3 full days
Outcome: Success! I learned something.

Monday, May 18, 2015

Quick Pencil Holders

I'm BIG into reusing stuff, and my sister was throwing out a bunch of these disks when she moved last summer.


I took a small tub of them thinking that there HAD to be something that I could do with them. I got them home, and promptly forgot about them. 

Then, I happened to purchase an EXTREME number of zip ties for something else, and was in my shed trying to come up with something quick and easy I could create during one cold rainy day, and it all clicked!

I drilled holes in the corners that didn't already have them, and used small width zip ties to assemble these cute pencil holders. 


My teens quickly grabbed them for their rooms, much to my surprise! 

Cost: $0
Time: about 30 min to figure it out, mostly.
Verdict: SUCCESS! 

Sunday, March 1, 2015

Not a DYI post

It's been just too cold to spend time out in my shed or yard. We had our annual ice storm this week, which was a bummer. 


My shed is calling me, and I am really hoping we only have about 3-more weeks of this. YUCK! 

I tried a really tacky art project that I'm never going to post. But it got me thinking about when I first started to let out my passion for reusing or repurposing things. 

That summer I used a bunch of pallets and reclaimed wood to customize my backyard, and I made my dad a birthday present.  It's really pieces of trees that he have me for firewood, hangars, and painted yogurt cups. I thought the shapes were too interesting to burn, so....Dad still doesn't understand it, but I like it, so I'm sharing pics.


When I took it to him, mom saw it and added bells to the painted yogurt cups. I got my crazy from her. ;)

Stay warm and safe! 


Friday, February 6, 2015

Another Pinterest success

You see things all the time on Pinterest, and you think to yourself, "I could make that". So you pin it. And three months later you go back and look at all your pins, and wonder if you're ever going to actually do any of them, or just keep pinning. Ha!

When I was putting up the Christmas lights, I came across a tree branch that was broken, and needed to be trimmed. Pulled out my saw, and trimmed it, thinking "here is some wood for that stuff I see on Pinterest". 


It sat in my shed for about a month, and then I decided to give it a whirl. Turns out, the hard part was getting a straight cut using my worn-out saw blade.

First I cut it into 4-5 inch sections. I realized pretty quickly that the bark on the cypress wood was just going to continue to flake off, so I sanded the outsides pretty thoroughly. Then used a drill bit to create a hole in the top for the tea lights. 


The 1 1/2 inch bit was the right size. Sawdust just went everywhere! You have to drill down pretty far, and I wish I had some clamps to hold the wood while I drilled. As it was, I wore gloves, because it kept trying to flip out of my hands.

I did try painting the bottom half of some of them, like Pinterest shows, but I did not like the effect.


The part of the branch that had split, and caused me to trim it, to begin with, was pretty interesting looking so I drilled some holes in it also.


After I had them all cut and drilled, I sprayed them thoroughly with some spray sealer. The sealer really helped to pull out the natural beauty of the wood.


Then I put them in bundles of three, and gave them as Christmas gifts... Except for the arch. The arch I kept for my mantle.


Total cost: $7.00 for the 1.5" drill bit.
Total time: 3-4 hours, mostly to allow for sealer drying. 
Verdict: SUCCESS!! 

Friday, January 23, 2015

Work desk Christmas Tree

So, I know Christmas was a month ago, but I really need an updated post, so I'm showing one thing I did back in December. Ha!

I have a new job and the decoration requirements are different than my last one. Add to that the fact that I'm in a cube, now, instead of the office to which I've been accustomed. So I had to really pare down what I usually do for decorations. It was kind of sad for me, actually. I have a thing for trees and suddenly couldn't put one up. :(( 

Then I remembered seeing various wooden trees on Pinterest made from pallets and old wood and such. :D WELL!! You all know how much I love building things and using up old wood and leftover items. 😁😁😁

So I went out to my shed to take a look at my stash, and joy of joys, I had exactly what I thought I would need. After a little measuring and cutting of some old fence picket leftovers, and the leg off of a TV tray I disassembled last year for shelves in my cabinets, I started painting. 

Then I drilled holes where I thought I could place some battery-operated lights I found at Dollar Tree, and then screwed everything together. 


When I got it assembled, I realized an error with my hole drilling. :( I can't very well put lights through the tree trunk. So then I had to drill more holes, which weren't as neat, and improvise on what to do with the holes drilled in error. 

Fortunately, I had an old Christmas lights necklace that had stopped working, that I was able to cut apart and use to decorate the tree. 


As with so many of my projects, it's not perfect, but it certainly works, and that's why I call myself the Make-Do Queen. 😉

Cost: $1.00 for the lights. 
Time: 2 hours (mostly due to paint drying)
Result: Success