Sunday, March 1, 2015

Not a DYI post

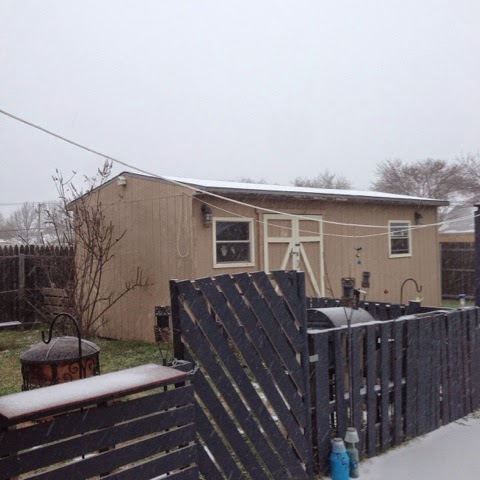
It's been just too cold to spend time out in my shed or yard. We had our annual ice storm this week, which was a bummer. 


My shed is calling me, and I am really hoping we only have about 3-more weeks of this. YUCK! 

I tried a really tacky art project that I'm never going to post. But it got me thinking about when I first started to let out my passion for reusing or repurposing things. 

That summer I used a bunch of pallets and reclaimed wood to customize my backyard, and I made my dad a birthday present.  It's really pieces of trees that he have me for firewood, hangars, and painted yogurt cups. I thought the shapes were too interesting to burn, so....Dad still doesn't understand it, but I like it, so I'm sharing pics.


When I took it to him, mom saw it and added bells to the painted yogurt cups. I got my crazy from her. ;)

Stay warm and safe! 


Friday, February 6, 2015

Another Pinterest success

You see things all the time on Pinterest, and you think to yourself, "I could make that". So you pin it. And three months later you go back and look at all your pins, and wonder if you're ever going to actually do any of them, or just keep pinning. Ha!

When I was putting up the Christmas lights, I came across a tree branch that was broken, and needed to be trimmed. Pulled out my saw, and trimmed it, thinking "here is some wood for that stuff I see on Pinterest". 


It sat in my shed for about a month, and then I decided to give it a whirl. Turns out, the hard part was getting a straight cut using my worn-out saw blade.

First I cut it into 4-5 inch sections. I realized pretty quickly that the bark on the cypress wood was just going to continue to flake off, so I sanded the outsides pretty thoroughly. Then used a drill bit to create a hole in the top for the tea lights. 


The 1 1/2 inch bit was the right size. Sawdust just went everywhere! You have to drill down pretty far, and I wish I had some clamps to hold the wood while I drilled. As it was, I wore gloves, because it kept trying to flip out of my hands.

I did try painting the bottom half of some of them, like Pinterest shows, but I did not like the effect.


The part of the branch that had split, and caused me to trim it, to begin with, was pretty interesting looking so I drilled some holes in it also.


After I had them all cut and drilled, I sprayed them thoroughly with some spray sealer. The sealer really helped to pull out the natural beauty of the wood.


Then I put them in bundles of three, and gave them as Christmas gifts... Except for the arch. The arch I kept for my mantle.


Total cost: $7.00 for the 1.5" drill bit.
Total time: 3-4 hours, mostly to allow for sealer drying. 
Verdict: SUCCESS!! 
Friday, January 23, 2015

Work desk Christmas Tree

So, I know Christmas was a month ago, but I really need an updated post, so I'm showing one thing I did back in December. Ha!

I have a new job and the decoration requirements are different than my last one. Add to that the fact that I'm in a cube, now, instead of the office to which I've been accustomed. So I had to really pare down what I usually do for decorations. It was kind of sad for me, actually. I have a thing for trees and suddenly couldn't put one up. :(( 

Then I remembered seeing various wooden trees on Pinterest made from pallets and old wood and such. :D WELL!! You all know how much I love building things and using up old wood and leftover items. 😁😁😁

So I went out to my shed to take a look at my stash, and joy of joys, I had exactly what I thought I would need. After a little measuring and cutting of some old fence picket leftovers, and the leg off of a TV tray I disassembled last year for shelves in my cabinets, I started painting. 

Then I drilled holes where I thought I could place some battery-operated lights I found at Dollar Tree, and then screwed everything together. 


When I got it assembled, I realized an error with my hole drilling. :( I can't very well put lights through the tree trunk. So then I had to drill more holes, which weren't as neat, and improvise on what to do with the holes drilled in error. 

Fortunately, I had an old Christmas lights necklace that had stopped working, that I was able to cut apart and use to decorate the tree. 


As with so many of my projects, it's not perfect, but it certainly works, and that's why I call myself the Make-Do Queen. 😉

Cost: $1.00 for the lights. 
Time: 2 hours (mostly due to paint drying)
Result: Success


Wednesday, November 26, 2014

Belated Fall Decoration

Several weeks ago, I had an idea for a small project. Between my birthday and a bunch of stuff going on at work and with the kids, I only just now got around to working on it this past weekend.

At this point, it's about seeing if I could actually do it, not using it for decorations. But now I will have it for next year. So, YEAH! Go me! Ha!

I started off by cutting and sanding some scrap 2x4, then spray painting them. 

Sadly, the color I absolutely love, espresso (Wonder why), I ran out of on the first block. But since I had recently purchased some orange, I figured it would work to do the other three blocks.

Then I pulled out my stencils, and trusty sponge brush, and stenciled the letters onto the blocks. In my head, it seemed like a good idea to have the letters actually "falling"...so. I don't hate it. I just wish I had measured better. 

Then I put a clear coat of glow-in-the-dark paint over it all. 

I tied some ribbon around one block, in an attempt to make it look like it had a stem, and voilà!

Now I'm ready for Fall...just in time for Christmas. Ha!

Cost: materials on hand
Time: 1 hour
Outcome: Success


Sunday, November 9, 2014

Fall decorating

Wow! I'm finally back to having energy for extra projects. 

I wanted to do something for my front poach, so I got out my favorite things-spray paint and letter stickers. 


Then I added in some fall themed items, and voila! 


Cost: $8 for pumpkins
Time: 30 minutes


Wednesday, August 6, 2014

Easiest Repurpose EVER!!

Some friends of mine had to downsize into a much smaller apartment last year, and I went to help them pack or sell things. 

When I pulled up to their house, I saw that they had already stuck a HUGE pile of stuff out by the curb for trash collection. One thing caught my eye. 


I quickly stuck it in my car and went on with the rest of my day. 

It has sat in my shed for almost a year, and I finally got the courage to work on it. I had been saving a bunch of plastic gift cards thinking I would cut them into pieces, spray paint them and create a glued mosaic onto the ball. As I stood there looking at it all, my eye caught on the gold spray paint and I thought, "Forget all that work! I'm doing this!". 

I wiped it down and started putting coats of gold spay paint on it, letting it dry between coats. 


After 3-4 coats, I decided it needed more shine, so I added a coat of spray glitter. Then started spraying it with a clear gloss enamel. 

I put on 5-6 coats of the clear, letting it dry between. 

Then I picked out a place in my garden. 


DONE! 

Cost: Materials in hand. 
Time: 1 day due to drying times. 

Outcome: SUCCESS!!


Side Note: I start a new job next week, PRAISE GOD! I'm not sure how often I will be able to create and post, though I'm working on one more project now. 

Wednesday, July 23, 2014

Pallet walkway

I really thought I had already talked about this. It was a very interesting project that I did last summer. But it turns out, I've not posted it. OOPS!

So, 4-years ago I bought this house. One of the big selling points was that it came with a really amazing shed that had electricity and storage and all kinds of interesting things already in residence. 

The issue was that I have two dogs, and getting to the shed in the dark or when it has rained was always a less than pleasant experience. 

I put down those cement stepping stones, but when I re-did the entire yard last summer (Wait, I haven't talked about that yet either? Double oops), the pavers became less than practical. 

I really have tried to use reclaimed resources as much as possible, because I don't have the $$ to spend, and I had found some really great old boards and talked a friend into helping me haul them home. But I was at a loss as to how to make them a raised walkway without spending tons of money on brick or rock or more wood. 
 
One day, I was staring at the pallets I had left from another project and an idea popped into my head. I quickly borrowed a truck and brought home more pallets and started to plan. 

First, I layed down some landscape fabric to stave off grass and weeds from growing up under my walkway. Then I started placing the pallets down, with an idea of them providing as much support as possible. 

It took some thinking to avoid big empty spaces, and since I wanted a clear boarder, I added in several 2x4s cut to length in spots, but finally I was able to lay my reclaimed planks. 


I did have to build a transition stoop at the shed doors, as the pallets were higher than the door clearance would allow. The previously mentioned stash in the shed provided excellent wood for that. 

I used long deck screws to connect the planks to the pallets, added in some old landscape border I pulled from another location in my yard, and used some bricks gifted from a friend to finish it out. 

I really like it, actually. It is very functional, and the wood was already weathered, so the look was right. 

NOTE: As you can see, a couple of boards were pretty warped, and over the last year, as I have seen long boards laying around, I have hauled them home and used them to replace those warped boards.

I've also added in some of those Dollar Tree solar stake lights so I can see the path in the dark. I need to get out there and mow so I can post an after-after picture. 

Total time: a solid weekend, with the hauling and placing and cutting
Total cost: $8 for the box of deck screws. 

Outcome: success!